MAKEWERKS
Funcle RBG

Can you print me a rubber band gun? — Xander (my nephew)
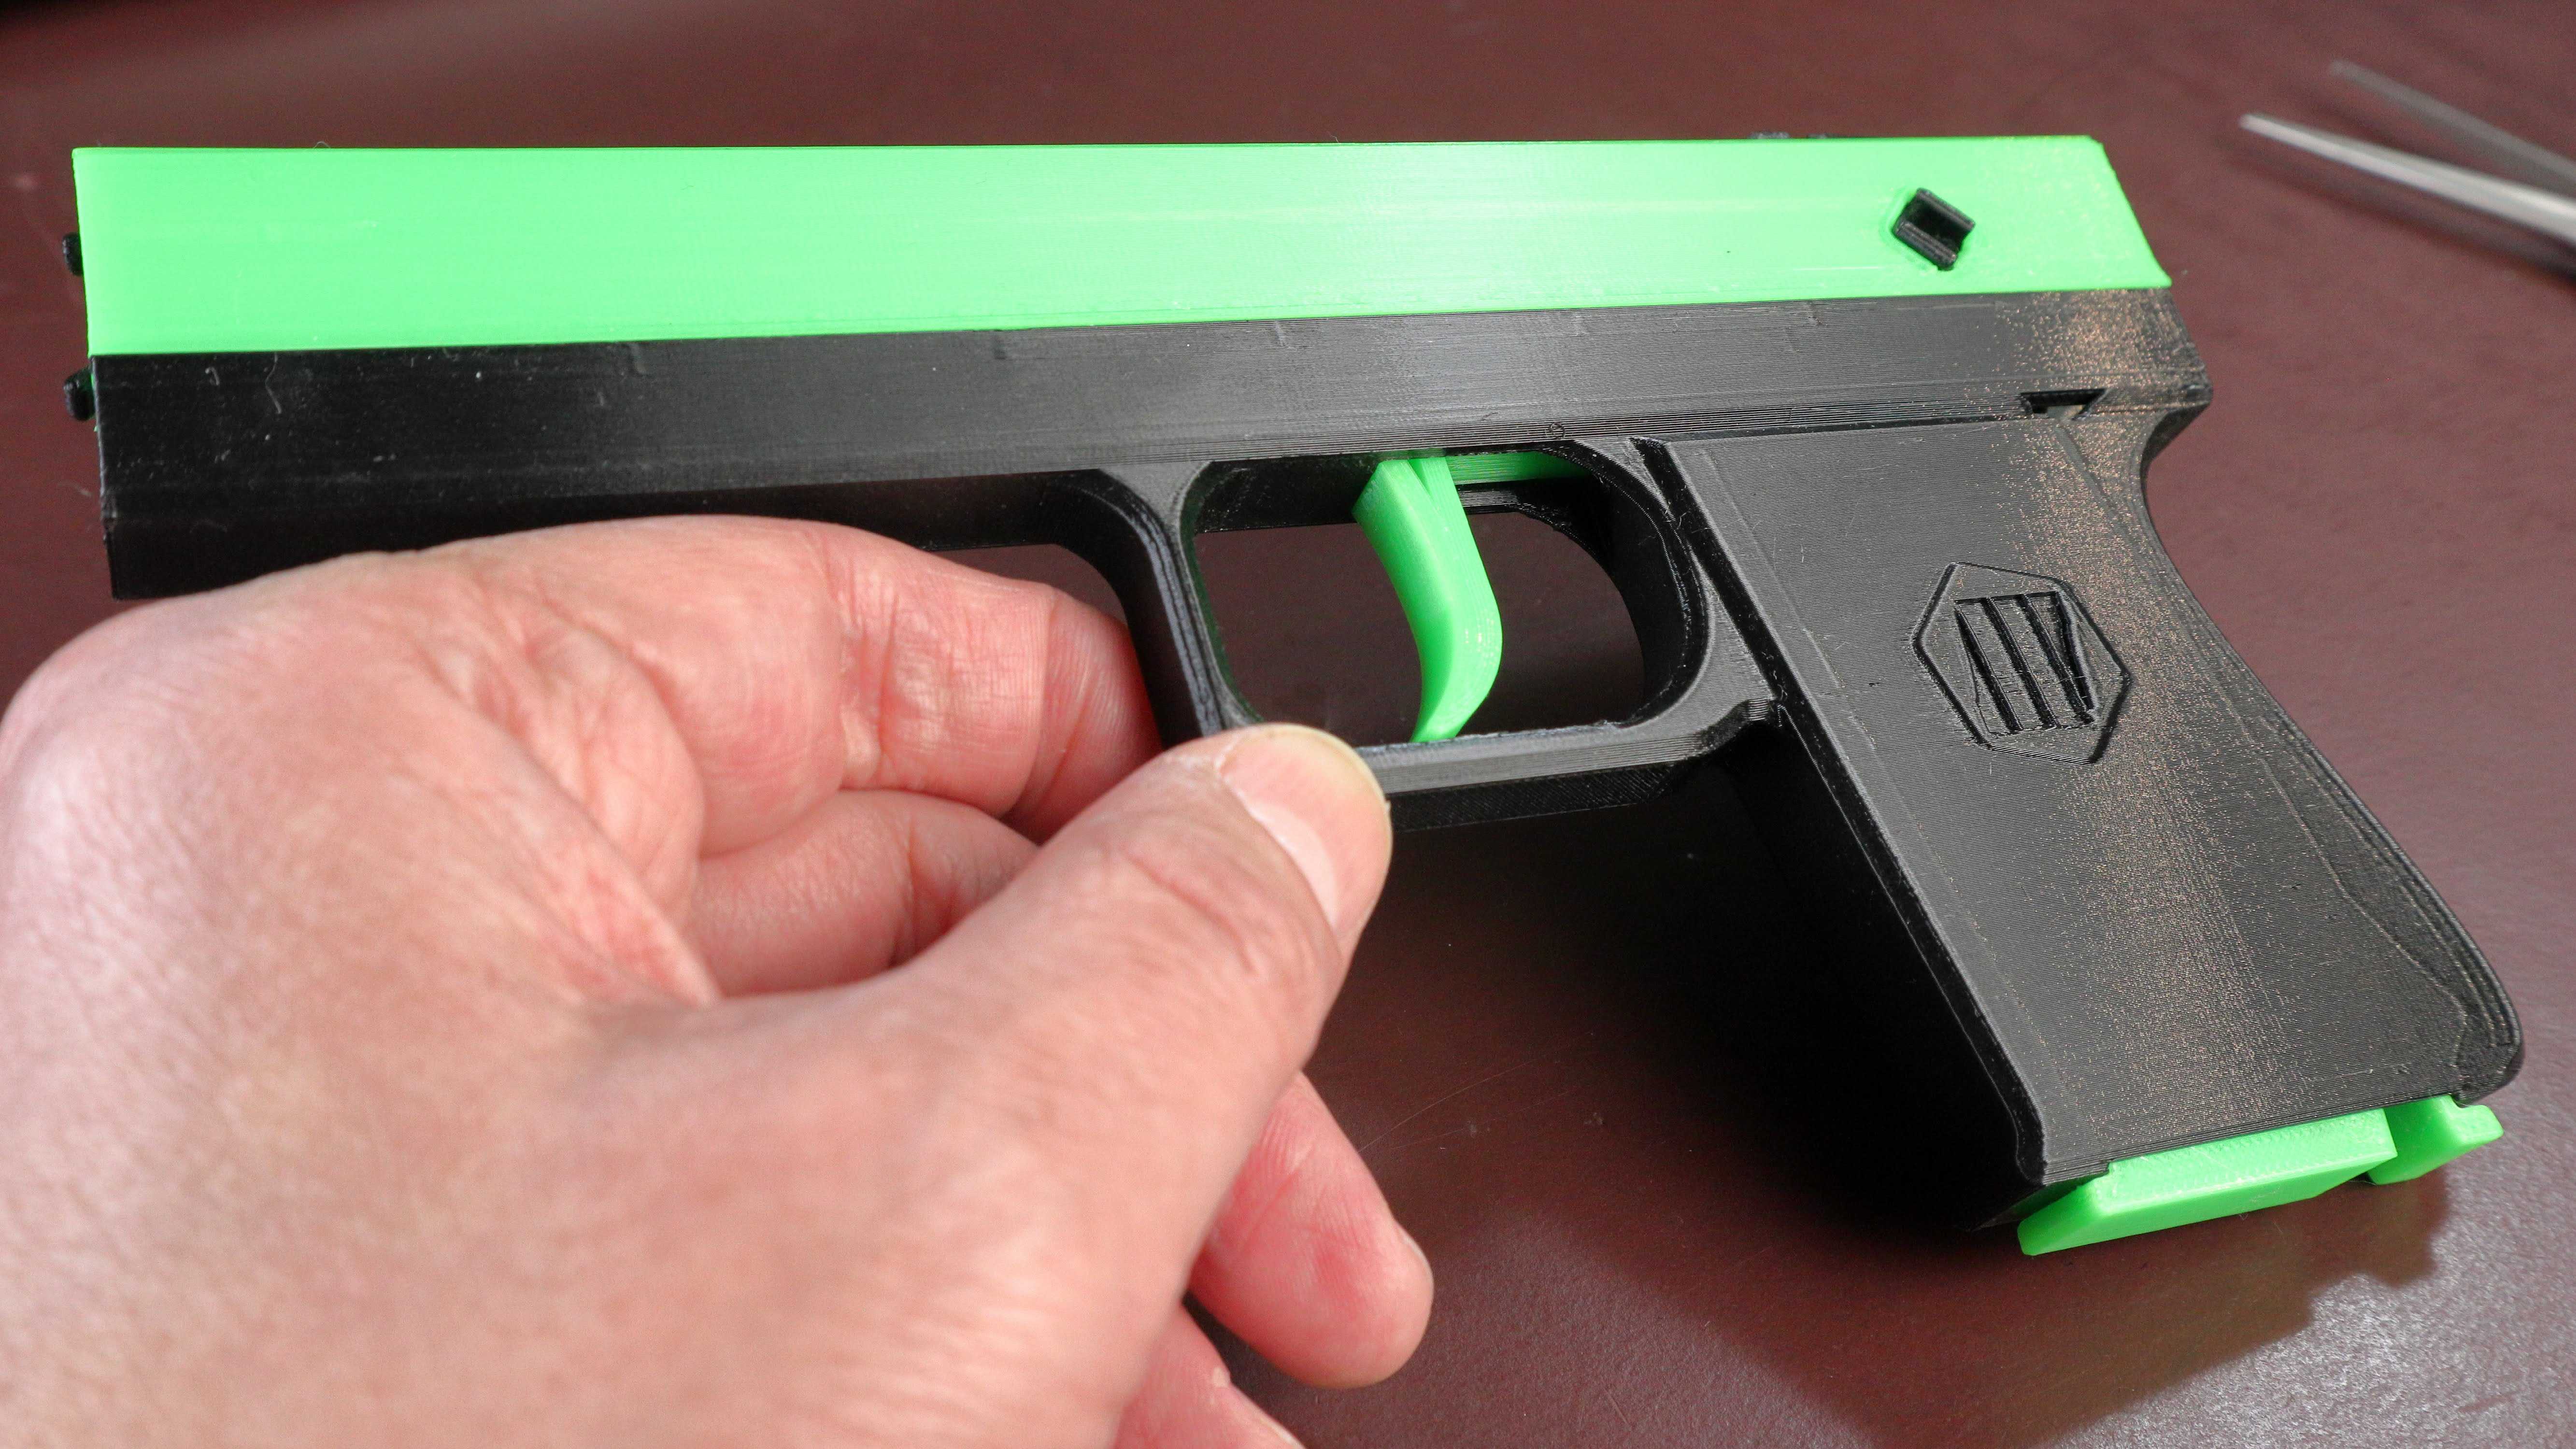
I said yes right away but then after some deep internet searching decided to come up with a more 3D-print (FFF) oriented design. Many months later, this resulting blowback style rubber band gun consists of only 3D printed parts and rubber bands — no pins, screws, springs or any other metal parts. It’s assembled from seven printed parts and requires two No. 12 rubber bands to power the trigger and slide returns. Here it is in action:
Note that if you go back and watch the full video, it shows some key printing, assembly and loading details.
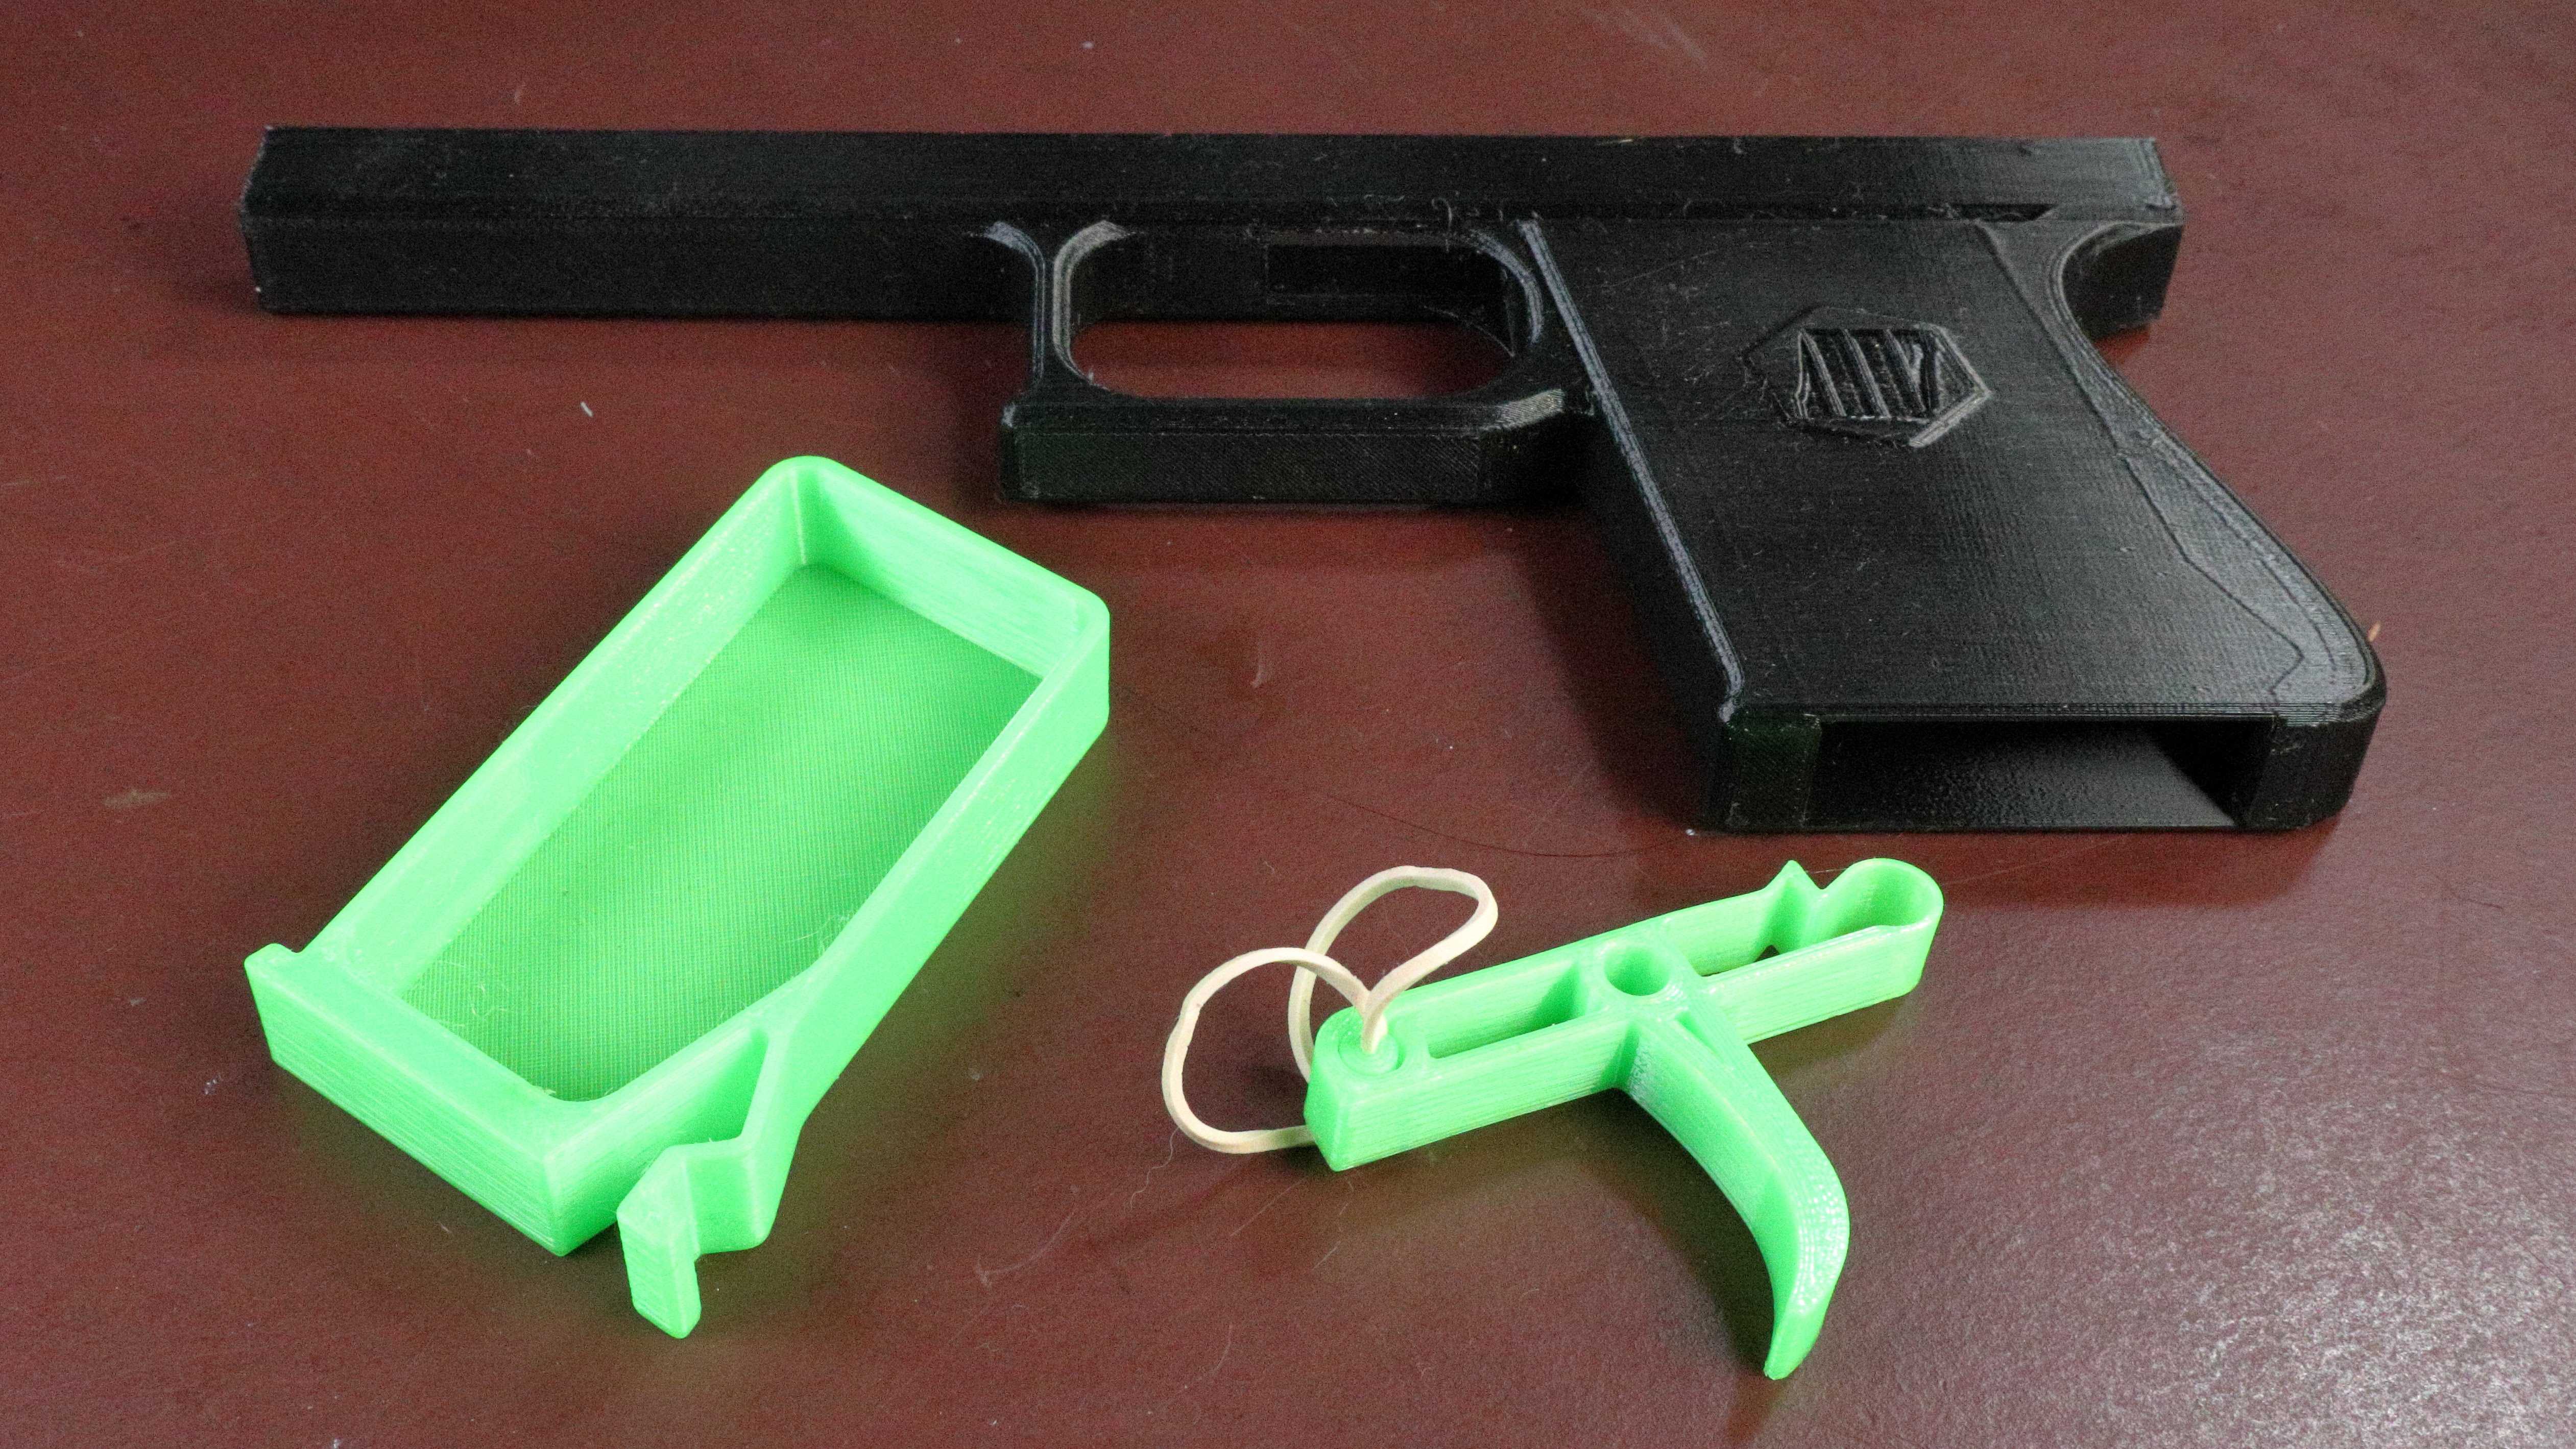
Body
The body assembly contains three component parts: the main body itself along with the trigger mechanism and rubber band magazine.
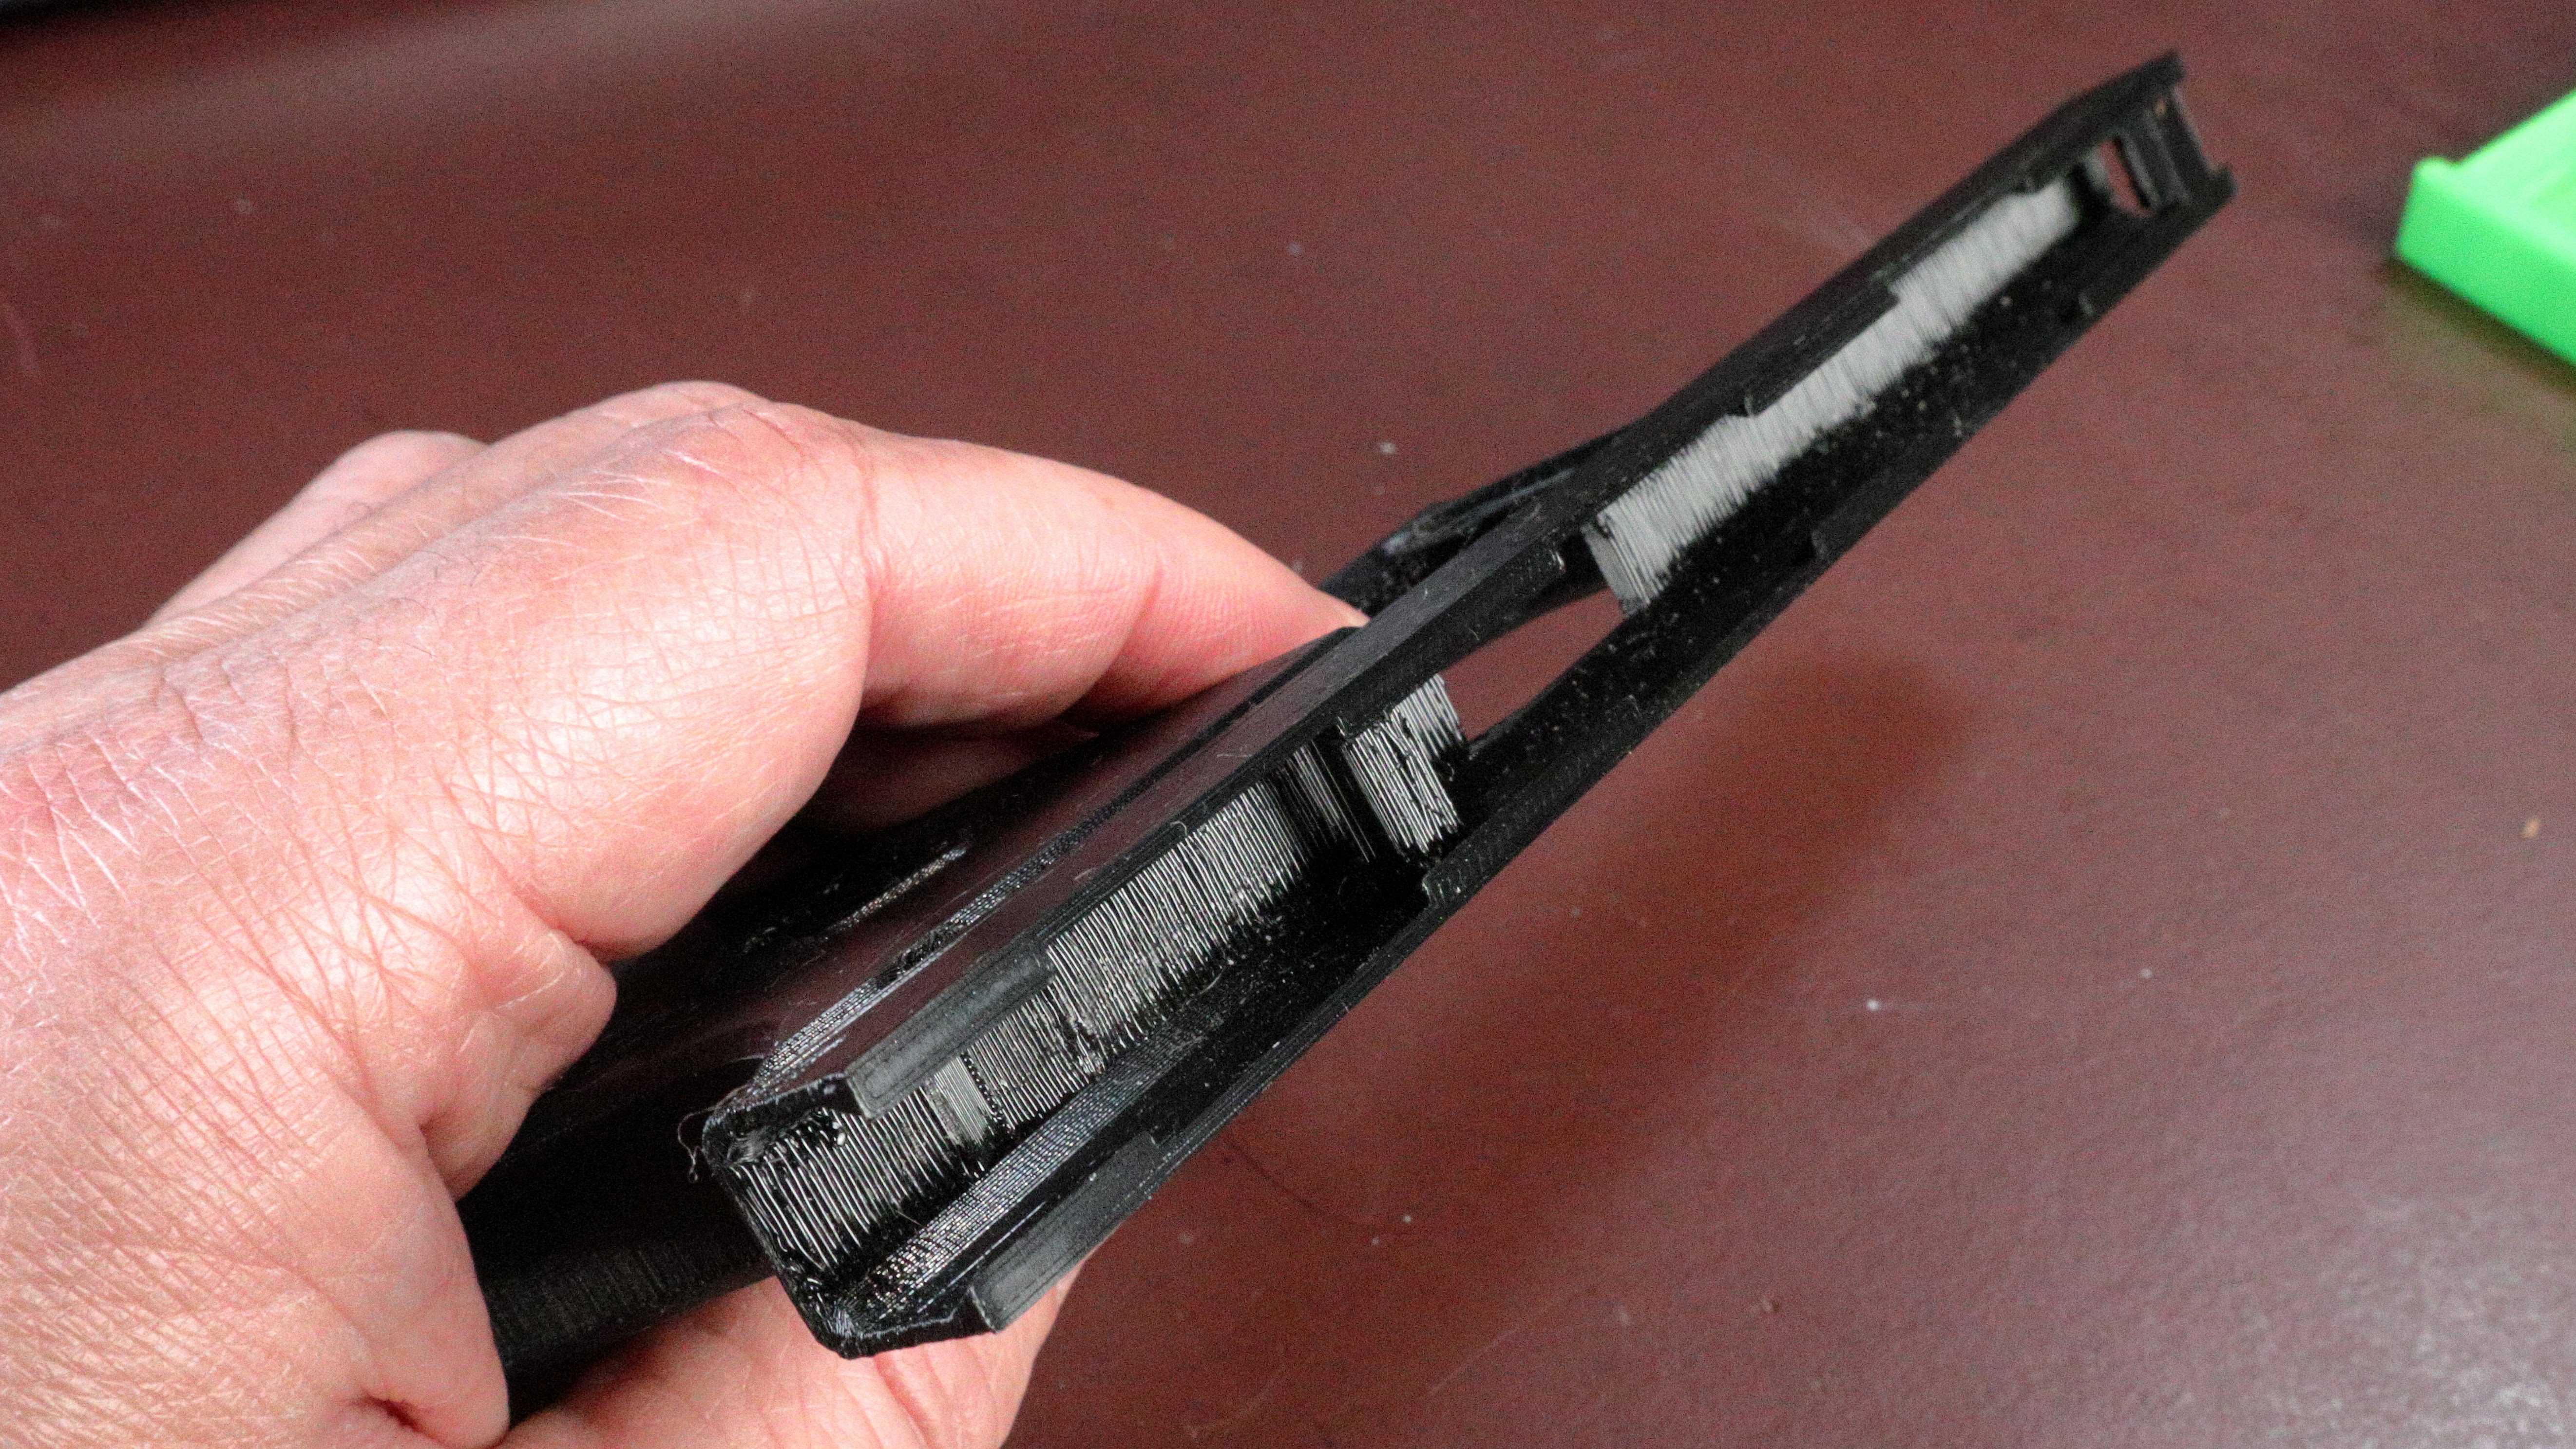
The features of the main body component include a mating surface and cutouts for the slide, a cutout for the trigger, a cleat on which both the trigger and slide return rubber bands mount and a cutout for the rubber band magazine. Not so obvious, but there are also surfaces that serve to actuate the trigger and firing wheel release mechanisms.

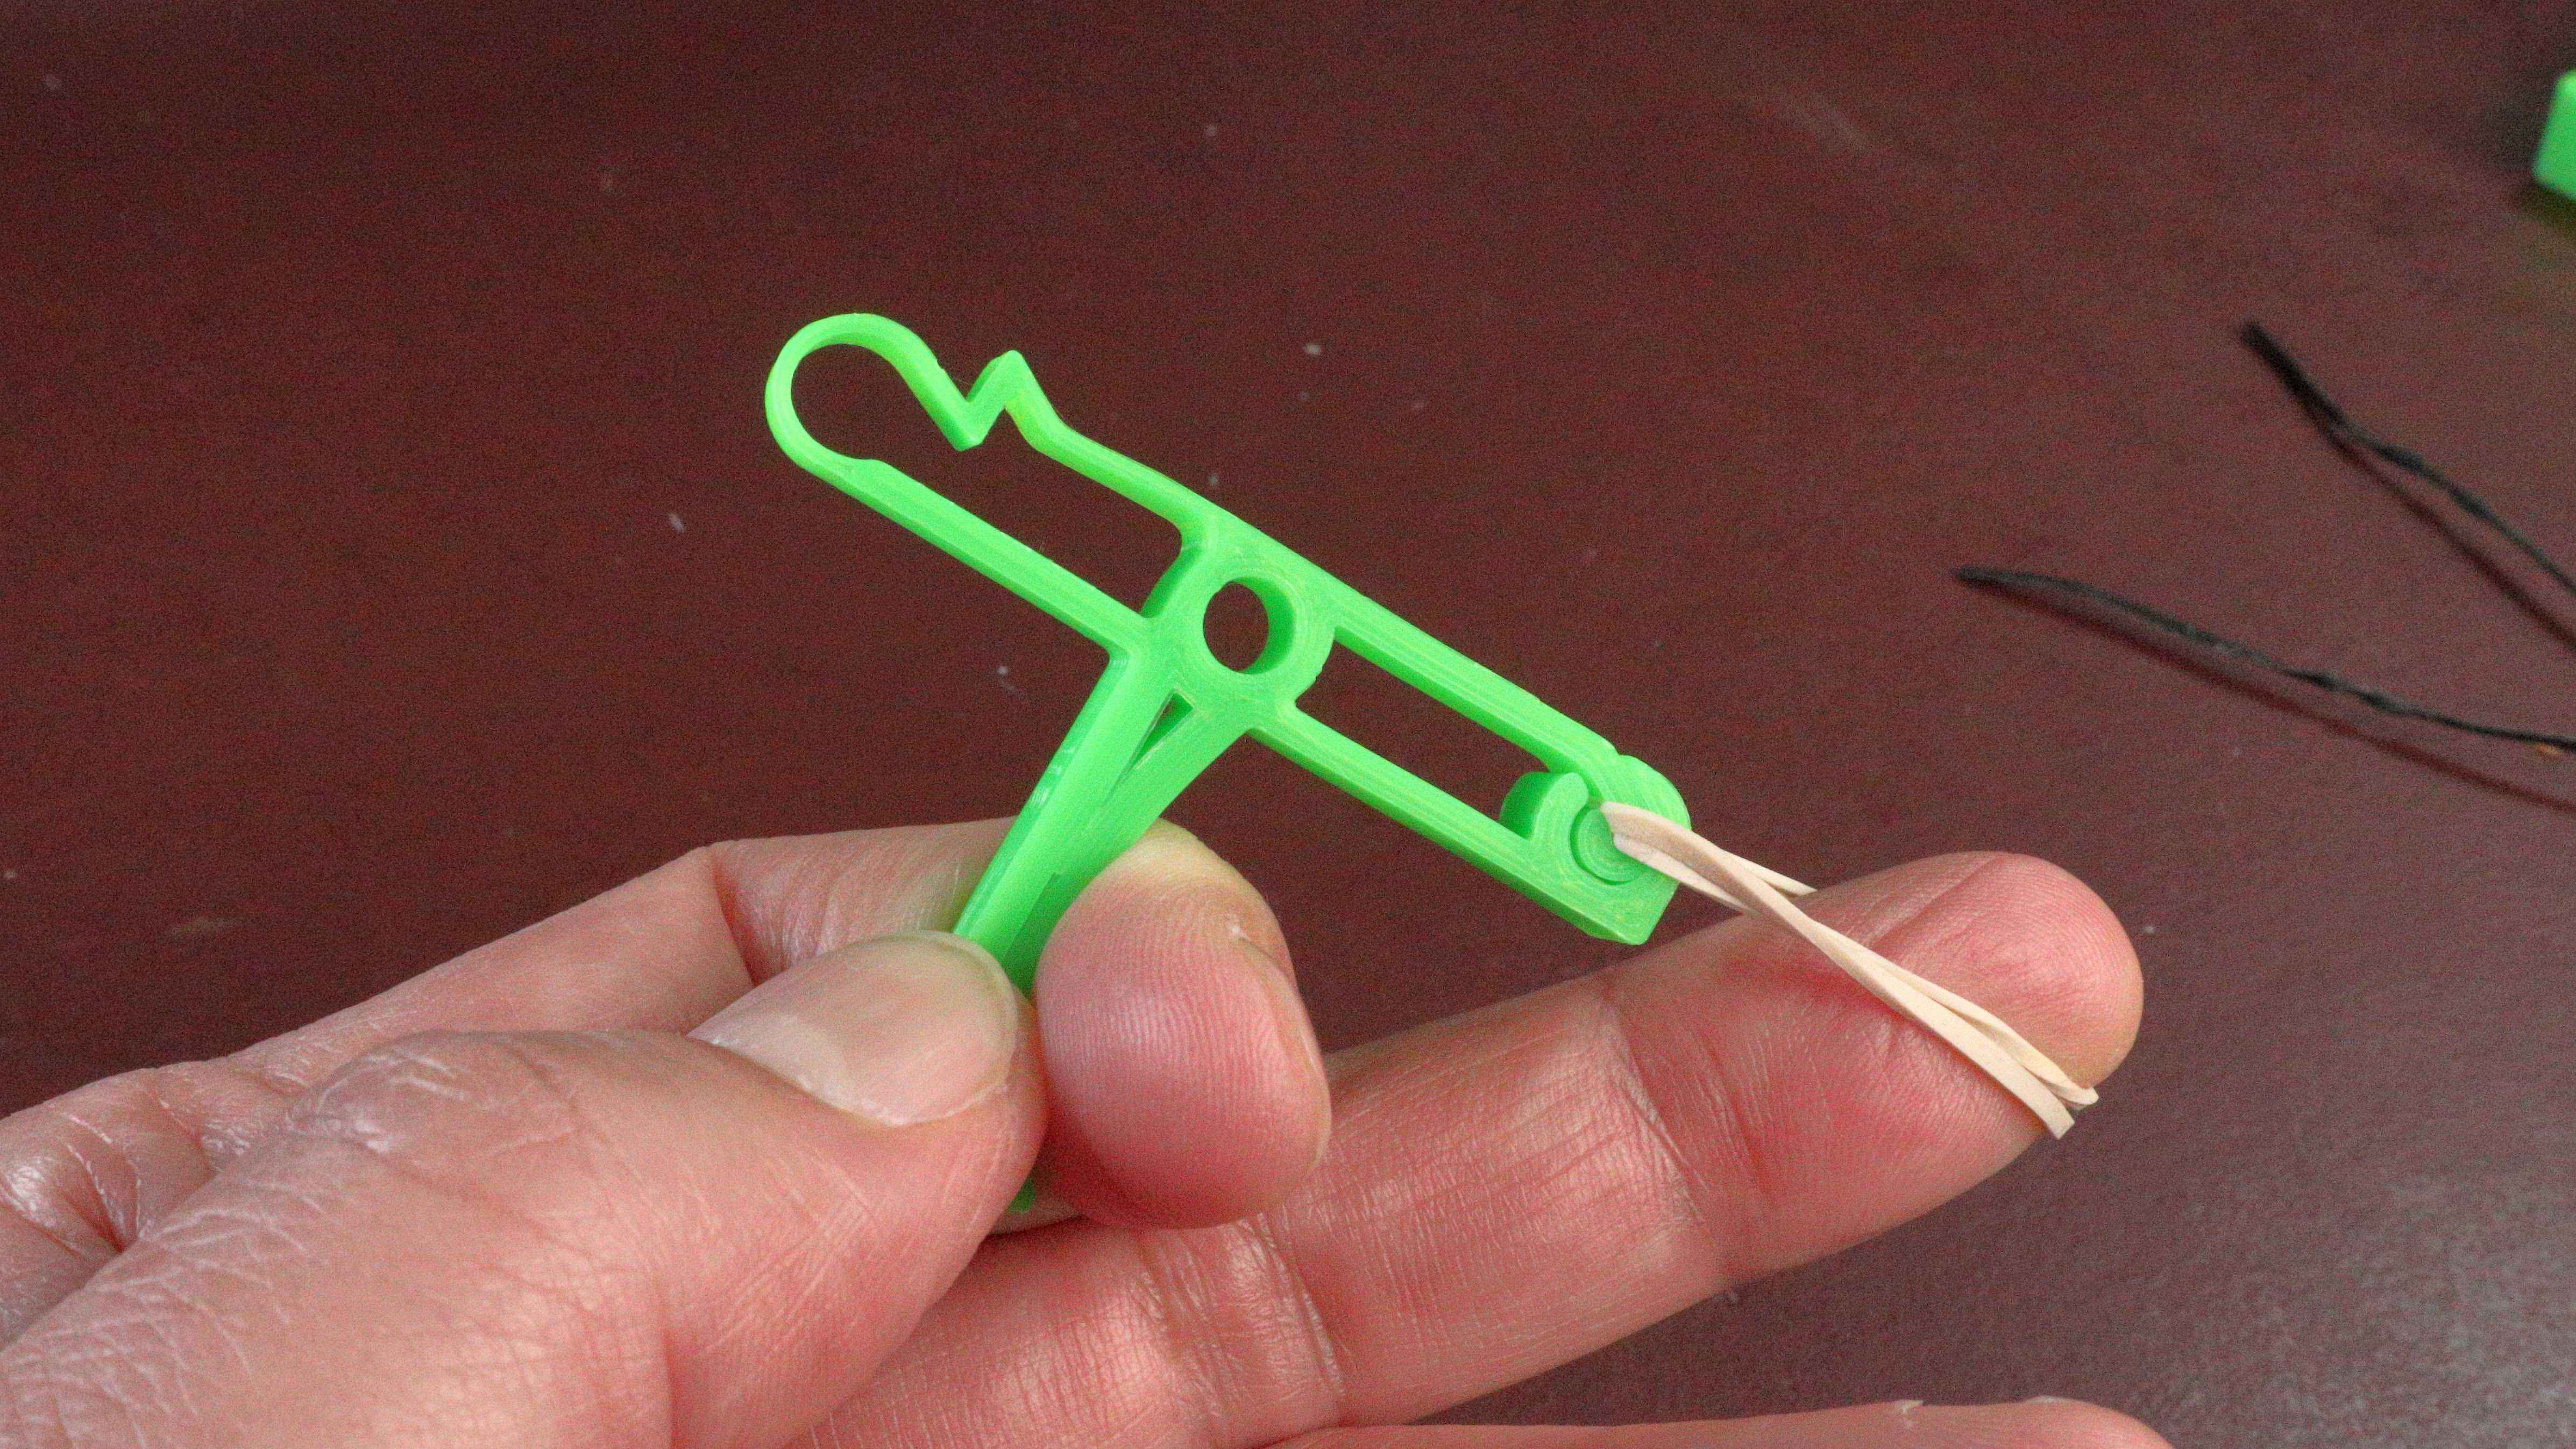
The trigger component also has a number of mechanical features. In addition to the trigger lever, its lower surface provides the sliding interface with the main body. The back end is a flexure based release mechanism and the front end contains the slot in which the trigger return rubber band mounts.
Tha magazine component provides storage for rubber bands or spare nozzles and firing wheel pins. It fits into a slot in the bottom of the handle of the gun body which also has a seat for the flexure based magazine release.
Slide
The slide assembly contains four component parts. There is the main slide, a nozzle, the firing wheel and associated firing wheel pin.
As with the main gun body, the slide component also has a number of features. Its bottom surface, cross-sectional profile and cutouts mate with the top surface of the body to create the sliding interface. The channel along the top allows allows for loaded rubber bands to stretch from teh firing wheel a the back to the nozzle at thr front. Three are cutouts and slots to accommodate the nozzle at the front and cutouts at the back to mount the the firing wheel with using its pin (axle). Finally, there is a notch that allows the trigger to pull back the slide until it is released.

The nozzle provides the forward loading point for multiple rubber bands stretching back to the firing wheel. The nozzle’s rear pin fits into a matching hole in the slide and its “lower jaw” flexes against the bottom of the slide.
The firing wheel is a print-in-place double helical (herringbone) planetary gear bearing. The hexagonally shaped outer ring gear has notches that serve as the rear mounting point for loaded rubber bands. This shape is also provides the rubber band release mechanism as it is allowed to rotate forward as the slide is pulled back with the trigger.
Its important to mount the firing wheel so that when the slide is in its normal, upright operating position, the slots on the rear faces of the firing wheel above the slide are oriented towards the forward/upper end of each flat (see the picture below).

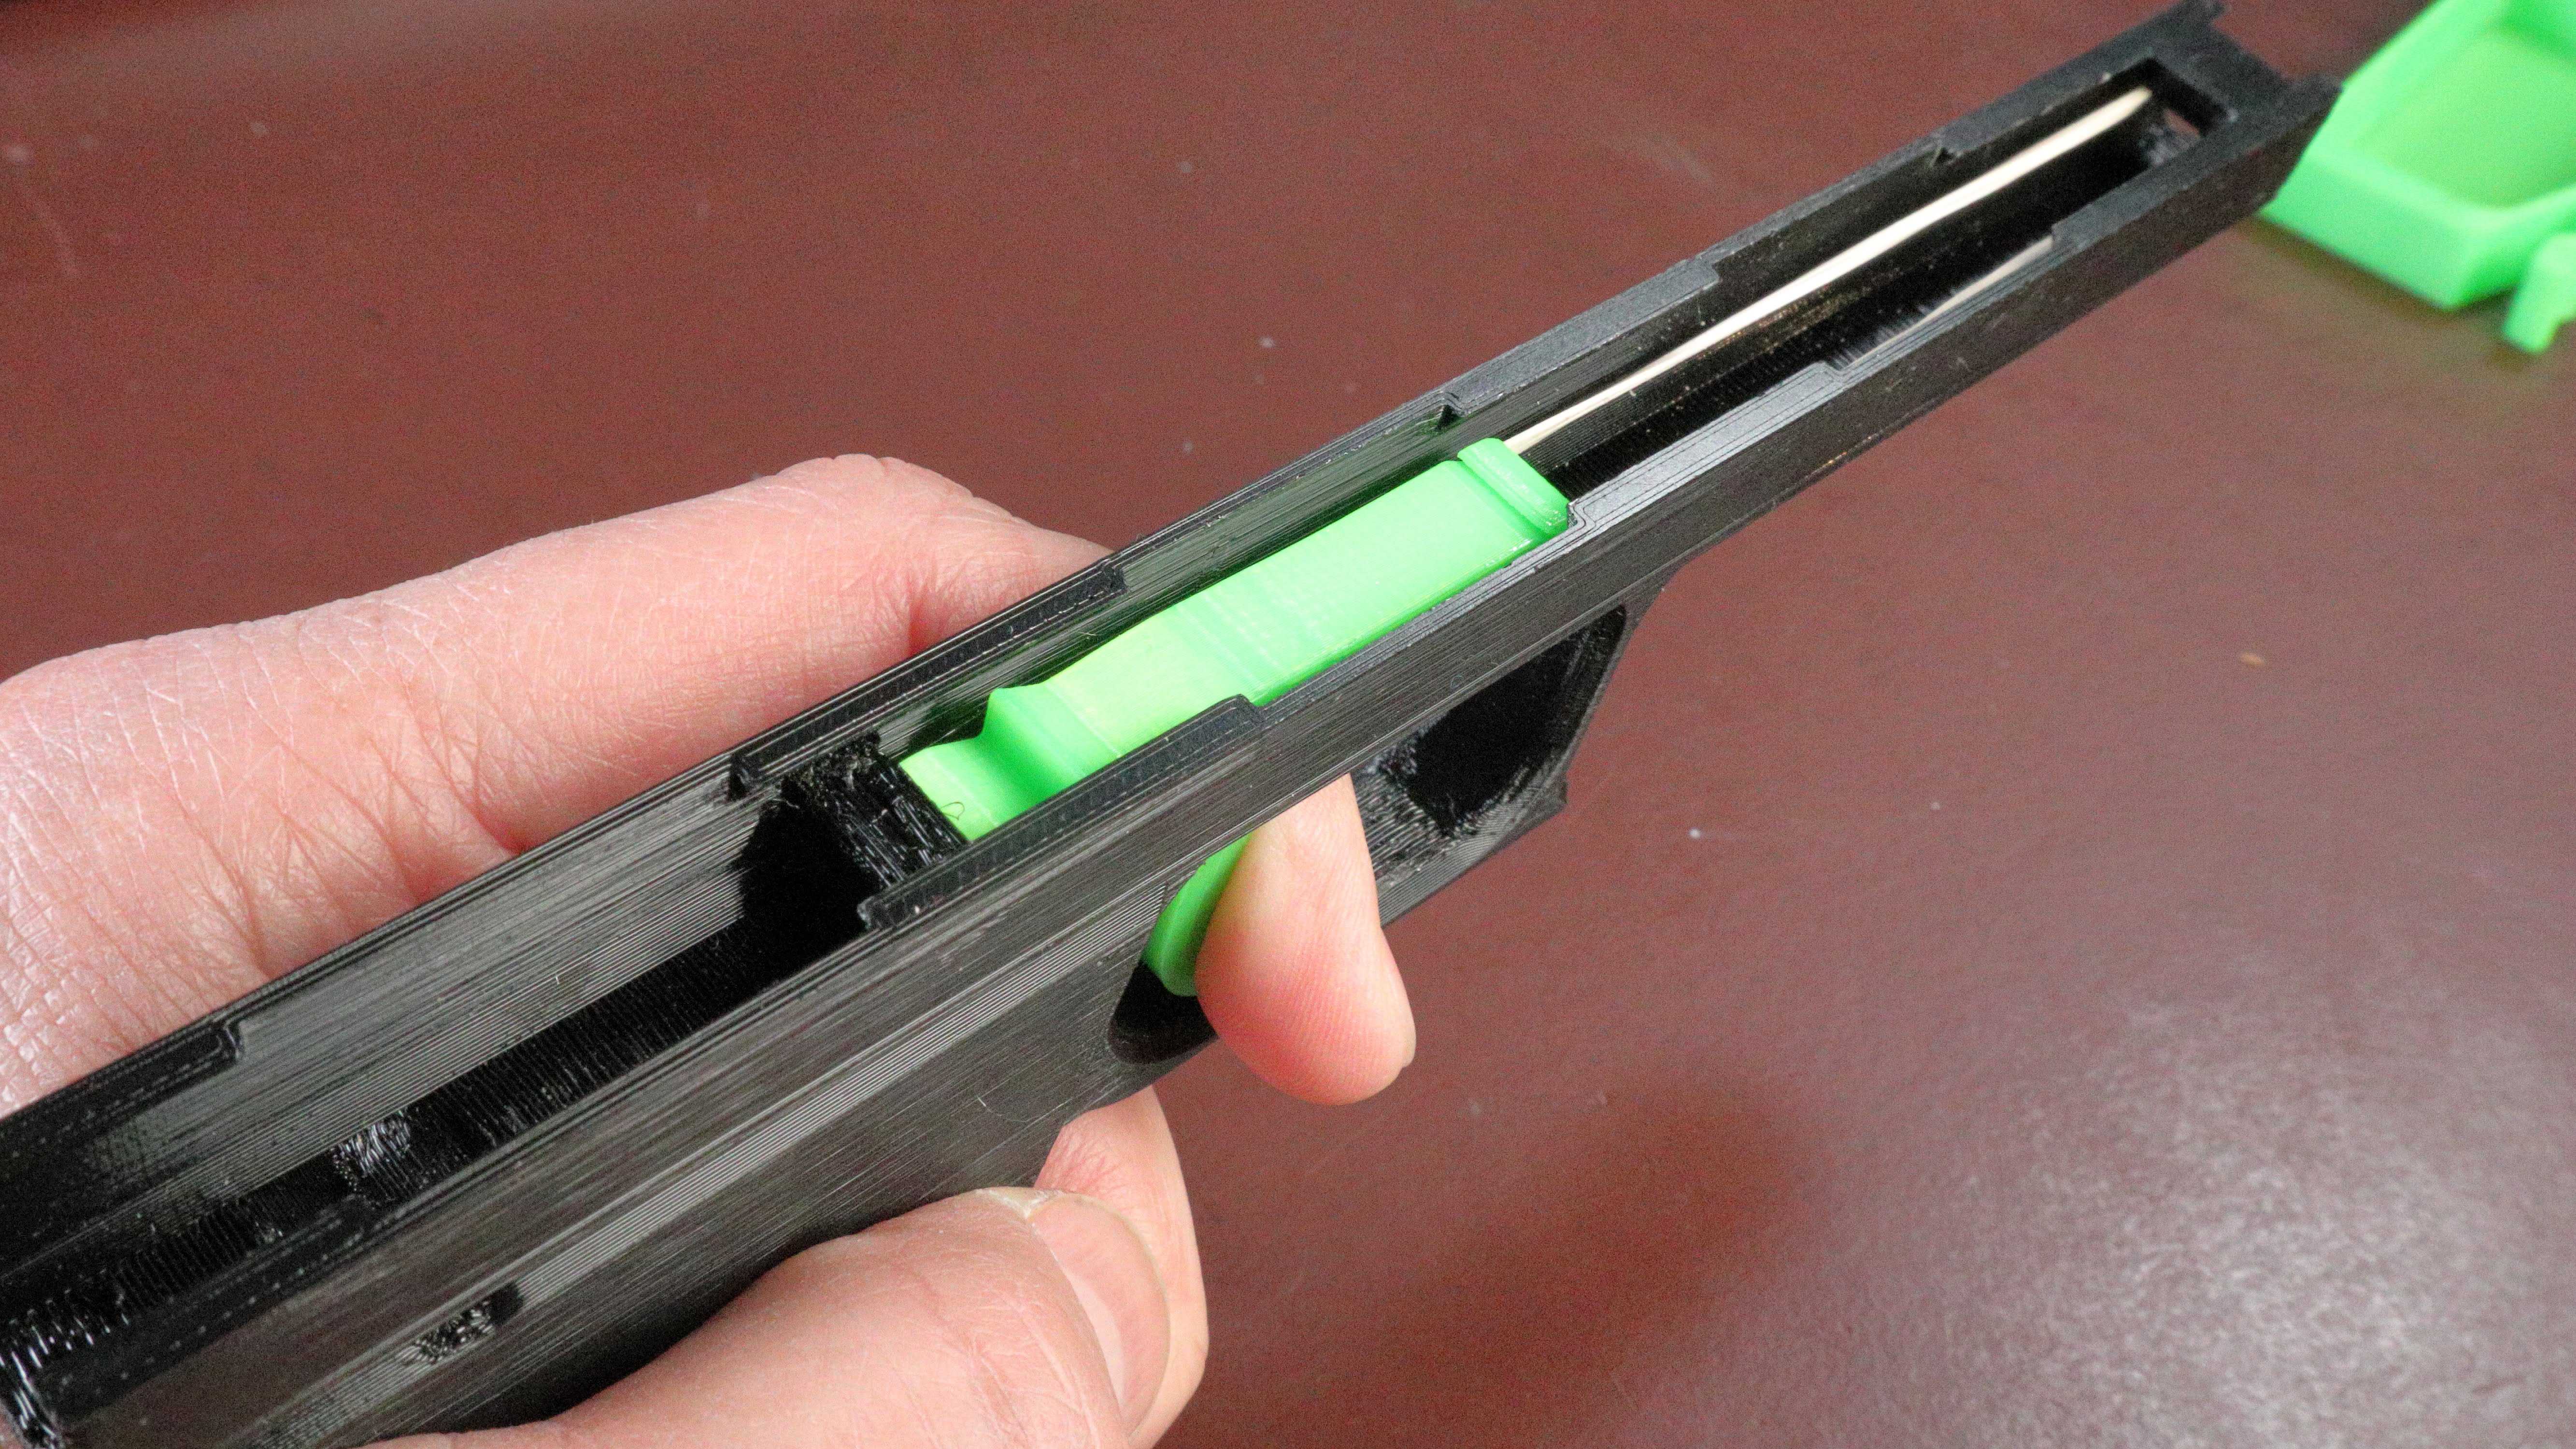
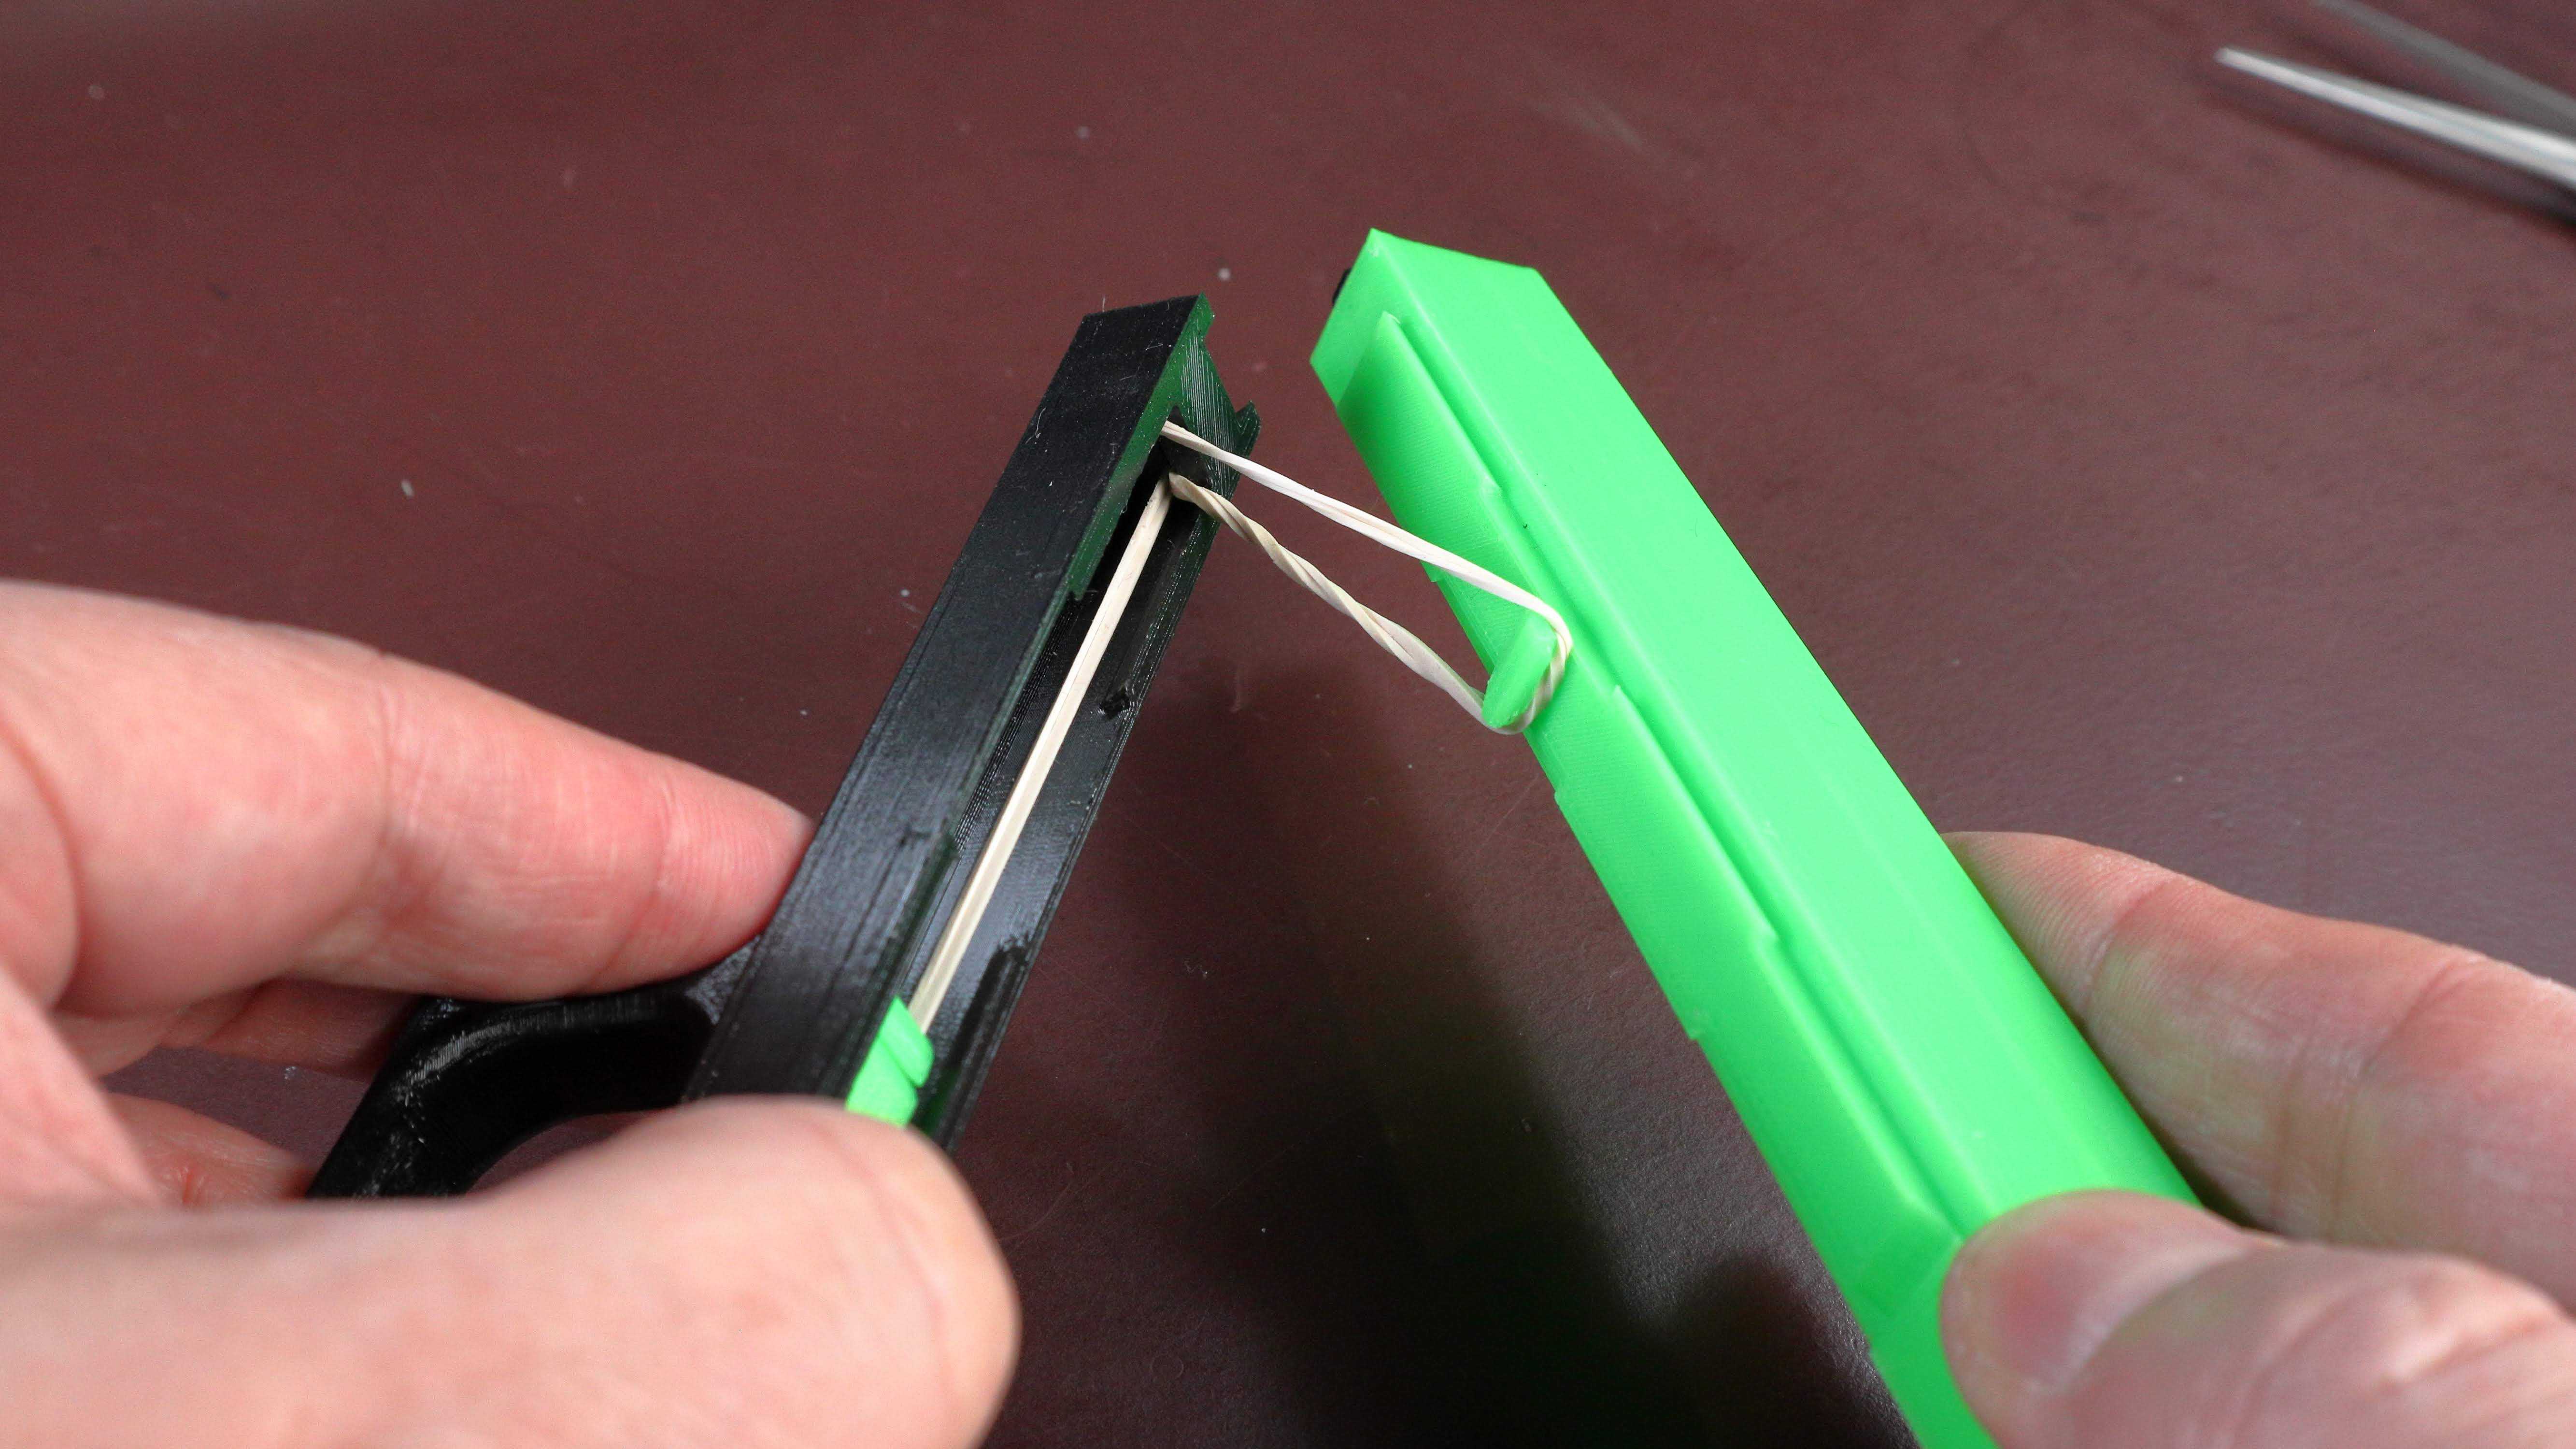
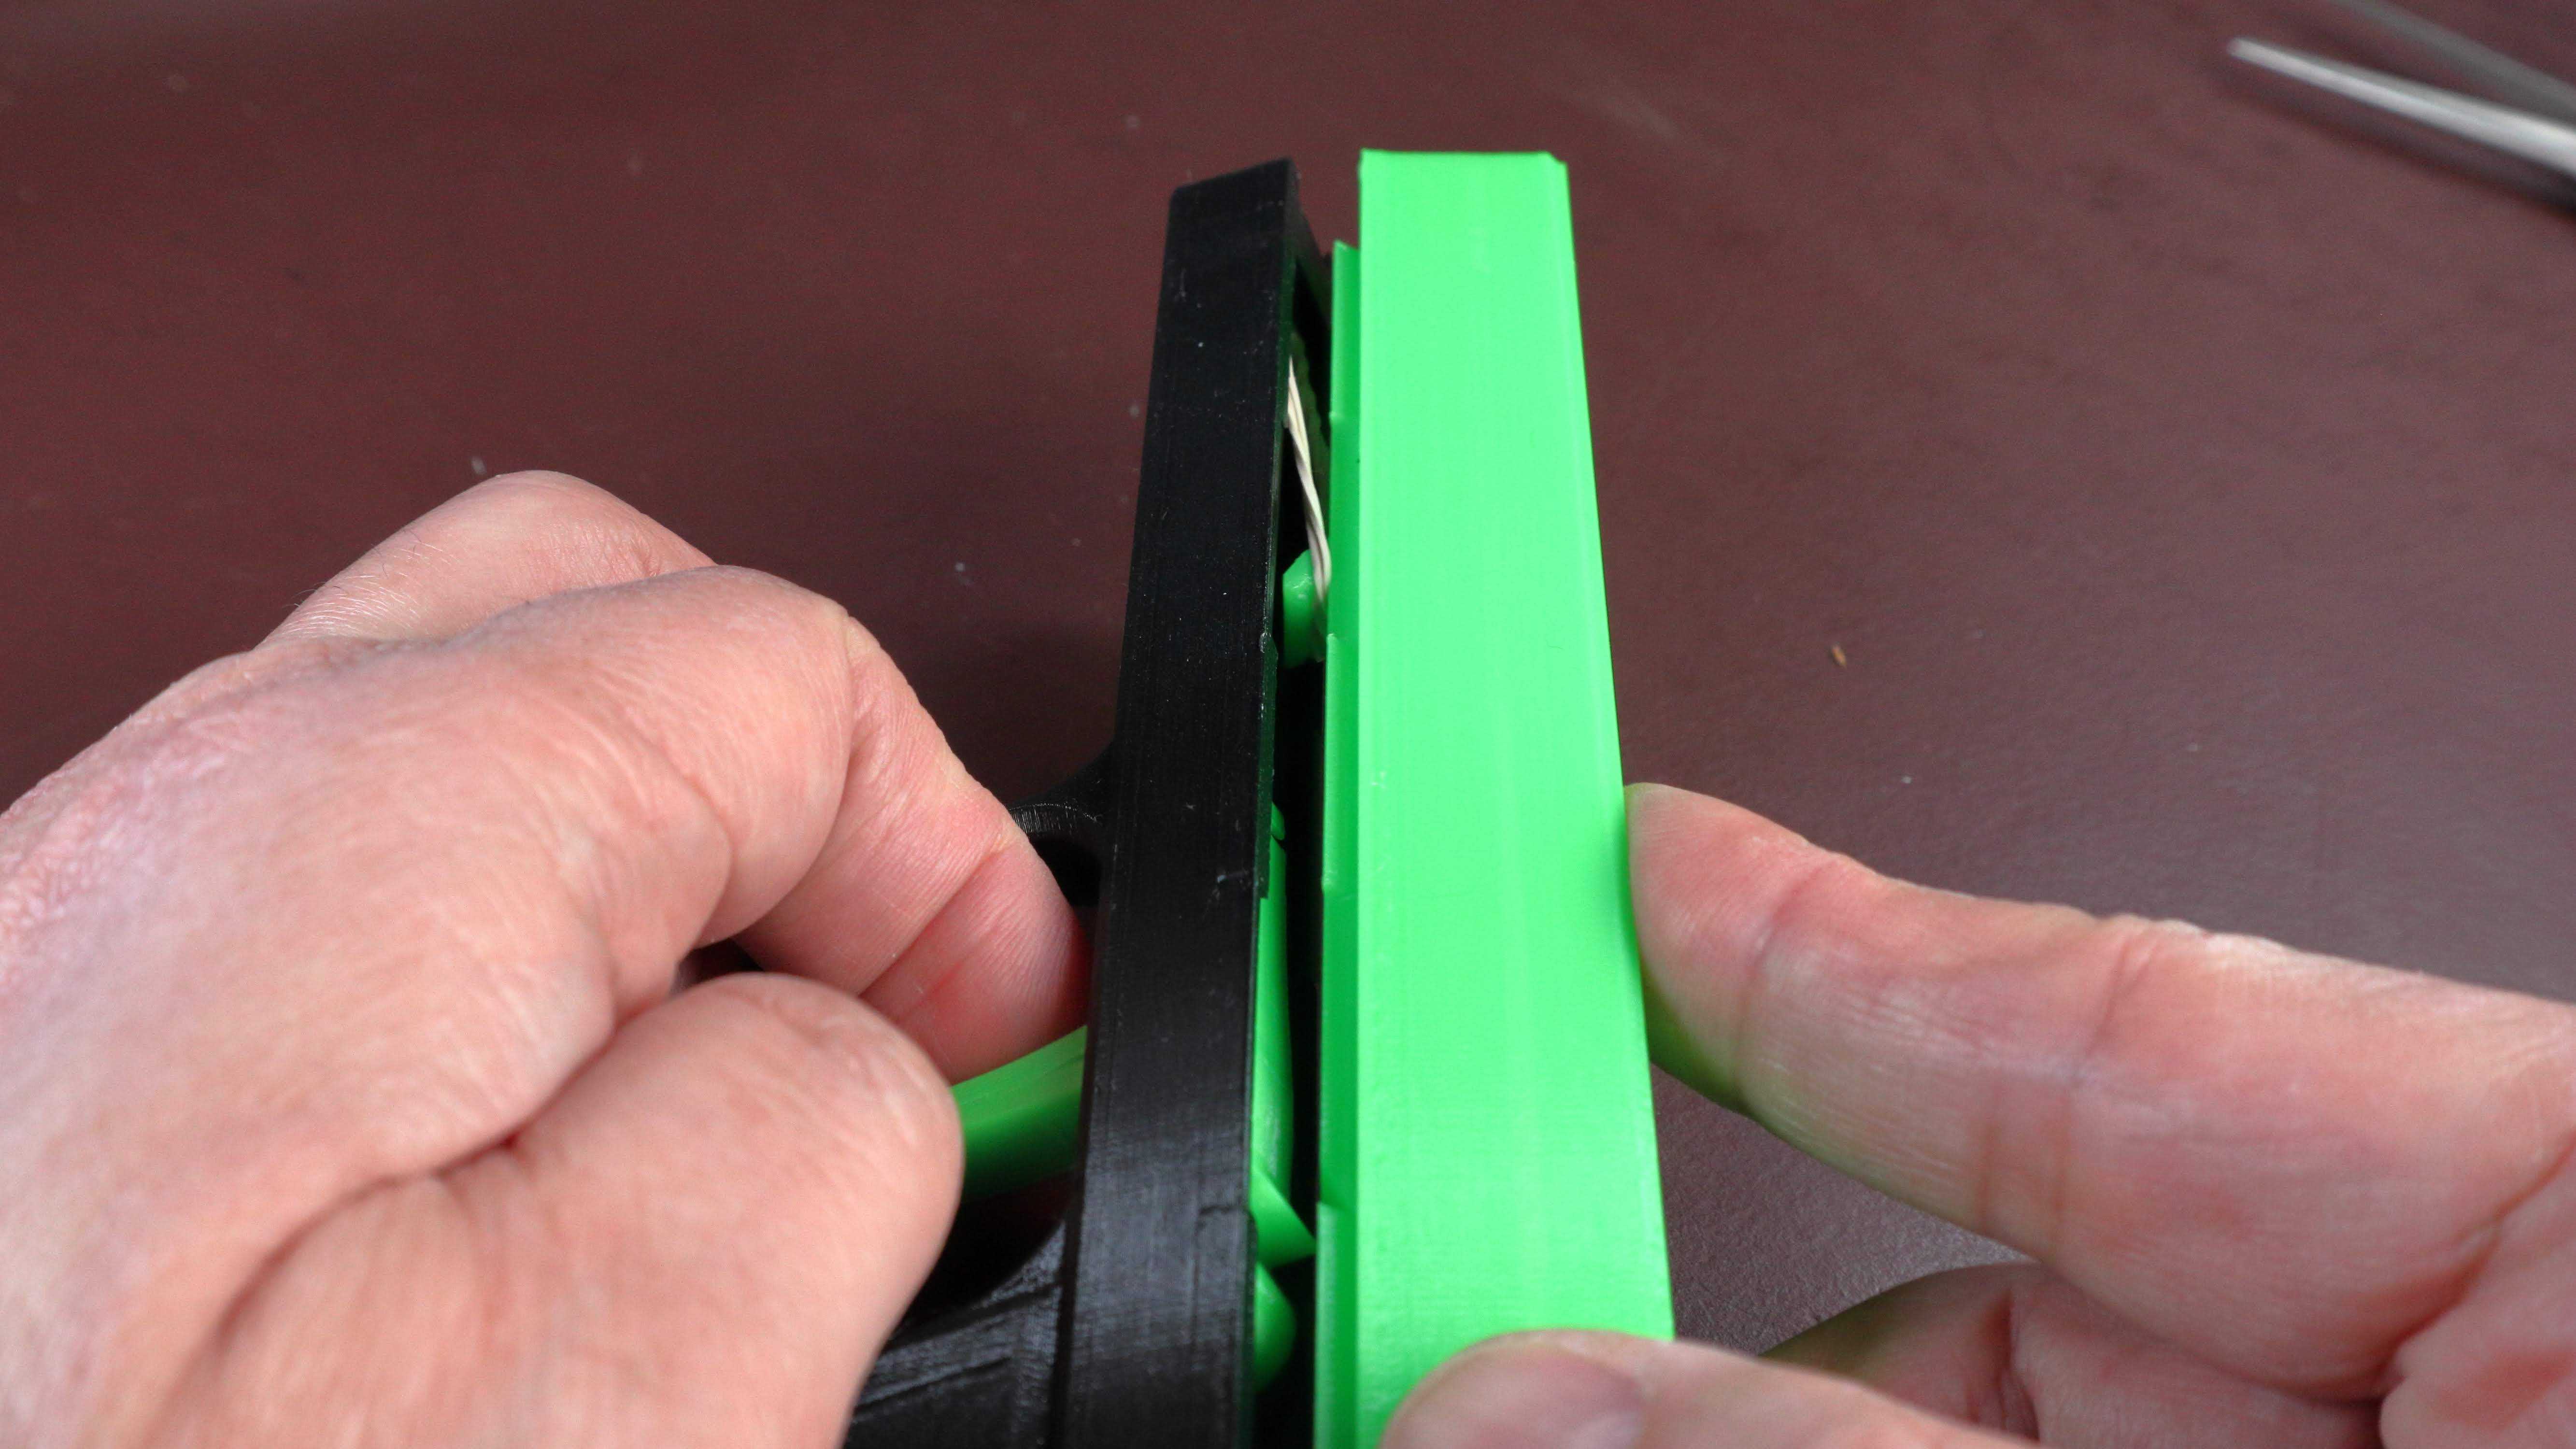
Rubber Band Gun Assembly
Assembling the slide to the gun body with both the trigger and slide return rubber bands can be a little tricky the first time but becomes simple after doing it a couple of times. The cleat at the front of the body provides the mounting point for both of the return rubber bands and the tricky bit is to hold the trigger in place while gently pulling it and the slide back until the the lower surface of the slide drops down into the body (shown in the video below) .
Design Inspiration
The blowback based firing mechanism was inspired by a number of those designed for wooden guns such as this one from Tenkou Kaku and the Parabellum Arms Mod. 1. Most of the 3D designs I was able to find seemed to be fairly close translations like this one by Heydji Duragou and Sun Sun. I like that this one is fully print-in-place WaltsWoodWorks3D but its blowback mechanism looks like it’s “single-action” in the sense that you have to pull back and release the trigger manually to have it fire.
Takeaways
After my first few Fused Filament Fabrication part designs (here and those used in the filament spool holder), I’m settling in on a few factors that guide what I think are good FFF projects and designs:
- 3D Print Design Aesthetic — Expose the beauty and differences afforded by the FFF manufacturing process… show the infill
- Fully Printed — Print-in-place, compliant mechanisms, flexures, snap-fits, folds… not a stock material substitute
- Functional Printing — Produce useful and interesting parts… enough with the benchies
- Open Source — Strive to document and share with the community… follow the leaders - RepRap, Prusa, slic3r, OctoPrint, etc
Oh, and I am the funcle.